
Battle of Coral Sea Facts

The Battle of Coral Sea occurred on May 4-8, 1942 in the Pacific Theater of World War 2. The naval battles that comprised the battle took place off of the northeastern coast of Australia and included the forces of Australia and the United States who took on the Japanese navy. The battle would prove significant as the first aircraft carrier battle fought and was the first to see no direct ship versus ship action. All attacks during the battle were conducted by aircraft and the Battle of Coral Sea would become the largest naval battle fought near the coast of Australia.
What is the Significance of the Battle of Coral Sea?
Contents
- What is the Significance of the Battle of Coral Sea?
- Where Did the Battle of Coral Sea Occur?
- Battle of Coral Sea Commanders
- Coral Sea Order of Battle
- Battle of Coral Sea Map
- Summary of Allied Losses During the Battle of Coral Sea
- Battle of Coral Sea Summary
- Battle of Coral Sea Video
- Battle of Coral Sea Conclusions
- Battle of Coral Sea References
The Battle of Coral Sea is considered a significant World War 2 battle today for two reasons:
")
1 – The battle would stop Japanese plans for the invasion of the Australian Port Moresby from sea.
2 – It would be the first time during World War 2 that the Japanese experienced failure during combat.
3 – After later analysis, the battle would be considered a tactical defeat for the Allied Powers, but a strategic victory since Japanese forces lost and ships placed out of commission during the battle would not be available for the Battle of Midway.
At the time, the press and general population attributed the Battle of Coral Sea as the “battle that saved Australia.” Today, historians credit the battle as important, but don’t hold it as the single act which kept the Japanese from invading Australia.
Where Did the Battle of Coral Sea Occur?
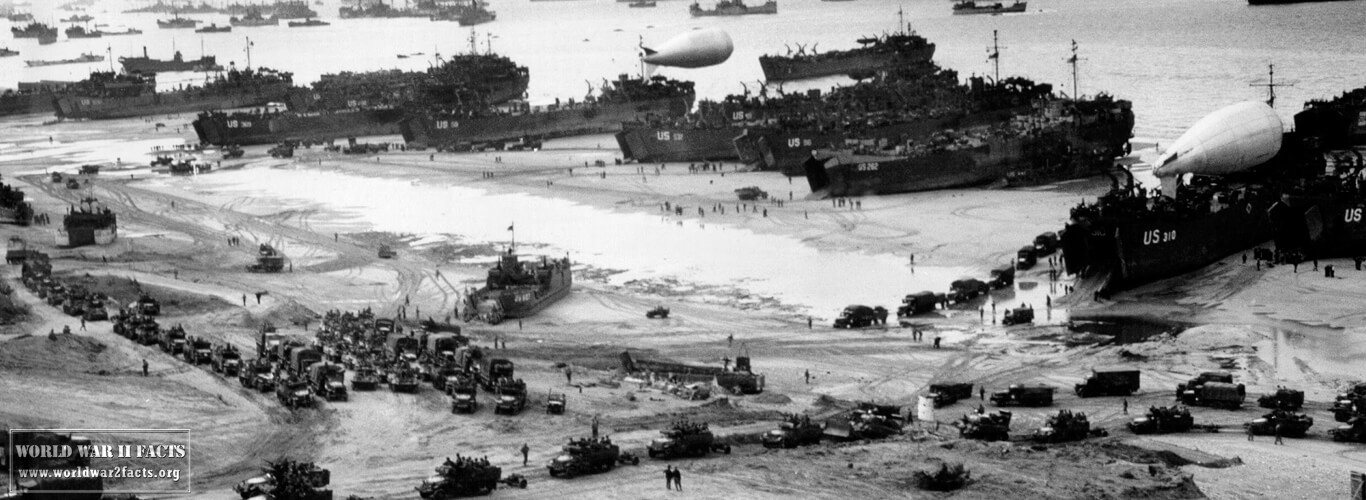
The battle took place between the Solomon Islands, Eastern New Guinea, the north-east coast of Australia between Townsville and Horn Island in the Coral Sea. The entire area of the battle covered more than a few thousand square kilometers with the opposing forces not knowing where the enemy was truly located during much of the battle. The primary method to locate and pursue the enemy during the battle (for both sides) was to use carrier aircraft to conduct reconnaissance.
Battle of Coral Sea Commanders
Allie Powers (United States, Australia)
Frank J. Fletcher
John Crace
Thomas C. Kinkaid
Aubrey Fitch

George Brett
Empire of Japan
Shigeyoshi Inoue
Takeo Takagi
Kiyohide Shima
Aritomo Gotō
Chūichi Hara
Coral Sea Order of Battle
Allied Powers
2 fleet carriers,
9 cruisers,
13 destroyers,
2 oilers,
1 seaplane tender,
128 carrier aircraft
Empire of Japan
2 fleet carriers,
1 light carrier,
9 cruisers,
15 destroyers,
5 minesweepers,
2 minelayers,
2 submarine chasers,
3 gunboats,
1 oil tanker,
1 seaplane tender,
12 transports,
127 carrier aircraft.
Battle of Coral Sea Map

Summary of Allied Losses During the Battle of Coral Sea
The Battle of Coral Sea saw the Americans and Australians lose more forces than the Japanese; however, would later be called a strategic success for the Allied powers. During the battle the Allies would lose: one fleet carrier, one carrier damaged, one oiler, one destroyer, 69 aircrat, and 656 killed.
The Japanese would lose:
One light carrier destroyed, one carrier severely damaged, one destroyer and three small naval ships, one transport damaged, 92 carrier aircraft lost, and approximately 1,000 men killed or wounded.
Battle of Coral Sea Summary
By May of 1942, the Empire of Japan had seen a significant amount of success at sea and on-land. The Japanese goals expanded to include taking all of New Guinea and the Solomon Islands to eliminate the final Allied bases between Japan and Australia. This action would also provide an additional security barrier for the land recently taken by Japan in the Dutch East Indies. Japan hoped to also pull the American navy’s aircraft carriers into battle to completely destroy the American fleet after missing the carriers on their attack against Pearl Harbor. The Japanese navy would sortie three fleets from Rabaul in
April to accomplish their goals.
The Japanese fleets would split with one moving toward the primary Allied base on New Guinea, Port Moresby, one towards Tulagi in the Solomon Islands, and a covering force led by Vice Admiral Take Takagi that would be centered around the Japanese aircraft carriers Shokaku, Zuikaku, and the light carrier Shoho. On may 3rd, the Japanese would occupy Tulagi island to setup a seaplane base. Commander-in-Chief U.S. Pacific Fleet, Admiral Chester Nimitz, would be made aware of the Japanese plans through radio intercept. In response, he dispatched the U.S. carriers YORKTOWN and LEXINGTON to protect Port Moresby.
The Allied forces were led by Rear Admiral Frank J. Fletcher who would launch strikes against Tulagi on May 4th, 1942. The attacks
would eliminate the Japanese use of the base for reconnaissance for the Battle of Coral Sea. The aircraft from the YORKTOWN would also sink a Japanese destroyer and five merchant ships. Later in the day YORKTOWN would join the LEXINGTON. On May 6th, 1942, shore-based B-17’s from Australia would spot the main Japanese force, but would fail to score any high-altitude bombing hits on the ships.
Both carrier groups (Japanese and Allied) would continue to search for the other without any success due to limited visibility in the area of operations. Admiral Feltcher would ultimately choose to detach his main surface combatant force of three cruisers and escorts to block the likely course of the Japanese invasion fleet. This group was designated Task Force 44 and would be led by Rear Admiral John Crace. The group would be considered vulnerable to Japanese air attack without being under American Carrier aviation coverage.
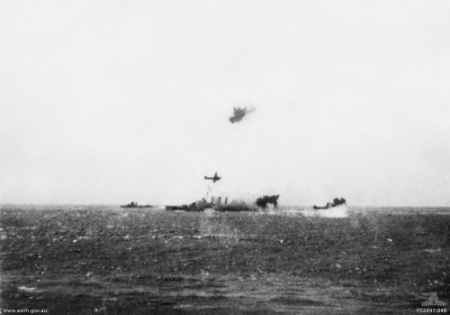
Although neither force was successful in finding the opposing main body, Japanese aircraft were able to find and sink the USS Sims (destroyer) and severely damage the American oiler, USS Neosho. U.S. aircraft were then able to locate the Japanese carrier Shoho and sunk it. During the sinking of the Shoho, LCDR (Lieutenant Commander) Robert E. Dixon was credited with the now famous radio call of “scratch one flattop.”
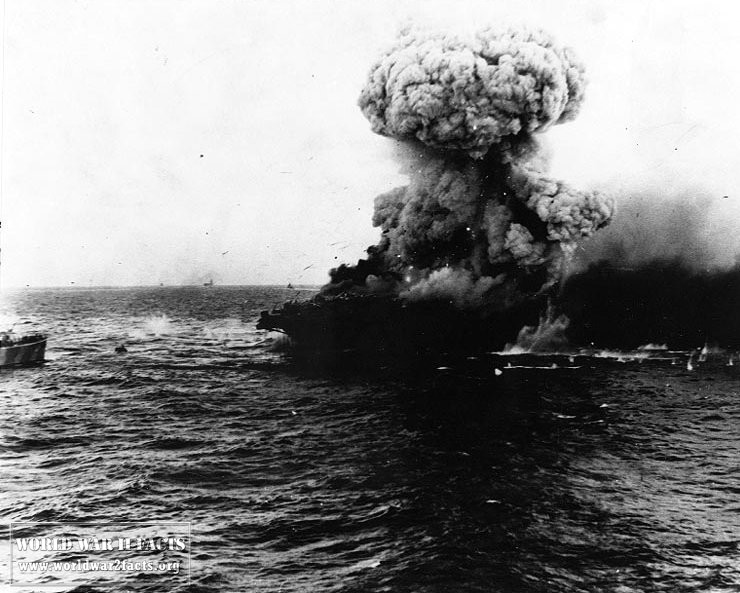
On May 8th, both fleets would ultimately locate the other and launch all available aircraft. The Allied aircraft were able to attack Japanese carrier, Shokaku, on three occasions and put it out of action. The Zuikaku was able to avoid taking any damage due to being hidden in a rain squall. At the same time, Japanese forces were able to hit the YORKTOWN with a bomb and the LEXINGTON with bombs and torpedoes. The Lexington had a supply of aviation fuel explode that would preclude the crew from putting out the fires. To prevent capture by the Japanese, the ship was abandoned and scuttled. The Japanese commander, Vice Admiral Shigeyoshi Inoue, would then order his invasion force to return to port with their approaches being blocked by the Allies.
Battle of Coral Sea Video
Battle of Coral Sea Conclusions
Immediately after the Battle of Coral Sea concluded, both the Japanese and Allied powers claimed victory. Looking back at the battle and in just terms of number of ships lost, the Japanese are considered to have won a tactical victory in sinking a greater amount of tonnage (41,826 long tons versus 19,000 for the Allies). With the loss of the USS Lexington, Allied carrier
Date 7 May 1942
power at the time was reduced by 25 %.
Strategically, the Allies are considered to have won the battle since the invasion of Port Moresby was avoided, the Japanese were forced to turn back without achieving their objectives, and this would mark the first time during World War 2 that the Japanese were turned back by the Allies.
Both the Japanese and Allies over-stated the amount of damage they inflicted on the opposing sides respectfully after the battle. As a result, the press would treat the reports of the Battle of Midway with a little more caution.
Immediately after the battle, the Japanese considered it a temporary setback. Their low opinion of the capability of the Americans was reinforced, and they believed that future action against Allied forces would be successful. By losing the Shōkaku and Zuikaku during Coral Sea; however, the Japanese forces would enter Midway with a smaller force than planned. They also believed that two U.S. carriers were sunk during the battle vice the one which was scuttled. This mis-belief, would later cause the Japanese to underestimate the total opposing force in Midway and be facing three American carriers vice two.
Battle of Coral Sea References
Australian War Memorial (Undated). “Coral Sea” (Bibliography of Japanese-language sources). Australia-Japan Research Project. Retrieved March 9th, 2013
Bullard, Steven (translator) (2007). Japanese army operations in the South Pacific Area New Britain and Papua campaigns, 1942–43. Senshi Sōshō (translated excerpts). Canberra: Australian War Memorial. ISBN 978-0-9751904-8-7. Archived from the original on 9 April 2009. Retrieved 1 March 2013.
United States Navy (Undated). “The Course to Midway”. United States Navy. Archived from the original on 21 October 2008. Sinking of the Lexington. Retrieved March 9th, 2013.